Showing posts with label spinning. Show all posts

Monday, April 27, 2009

Colorful Cotton Lint

My friend Peggy gave me 2 pounds of ginned cotton lint last fall to experiment with dyeing. I have not done too much cotton dyeing so every time I do it, I have to wing it a bit. The MX Dyes are not my friend - yet anyway. I was sure that I did not want to spin the undyed lint though. That would be way too boring!

I found instructions for dyeing the lint and also for dyeing cotton sliver at the Cotton Spinning Website.

Joan Ruane runs this site, and she is an expert cotton spinner. She has instructions for dyeing the lint or sliver with both the MX Dyes and also with Natural Dyes on her website and she also has a DVD on how to spin cotton that is available there.

I sort of combined Joan's instructions on dyeing lint with her instructions on dyeing sliver, as I wanted multi-colored lint to spin rather than a solid color.

Here is what I did:
  1. Scour the Cotton - put a pot on the burner and fill it about 3/4 full of water. Add a little dish soap. Break up the lint and immerse it in the water, forcing it under. Bring the pot to a simmer and let it simmer for 15-30 minutes or so. A lot of dirt will come out.
  2. Rinse the Cotton and squeeze out most of the water.
  3. Soak the wet lint in Salt water for 10 minutes - Here I switched to the instructions for dyeing cotton sliver. I used Joan's instructions of 1/2 cup of salt dissolved in one gallon of water and let my lint soak while I mixed my dyes and activator solution.
  4. Mix dyes - I used Joan's recommendation of 1/4 tsp of dye powder to about 3/8 cup of water. I mixed the colors I wanted - a green, a purple, turquoise and navy blue in separate bottles.
  5. Prepare soda ash solution to activate the dye - I mixed in another container 1/4 cup of soda ash to 3/4 cup of hot water. This should be enough soda ash solution for 6 colors of dye stock, so I was good with my 4 colors
  6. Squeeze out wet lint and put it on plastic sheet - at this point I took the wet cotton lint from the salt water solution and squeezed it with my hands until it was fairly dry. I lined my concrete mixing tub (a useful Home Depot or Lowe's item) with a few sheets of newspaper and a large sheet of clear plastic from a partial roll my friend Laurie gave me. A garbage bag or a couple of sheets of saran would work. I then spread out the wet lint on the plastic in the tub.
  7. Add activator to dye and apply - One at a time I added 1/8 cup or 1 ounce of activator to each dye. Then I applied that color at random on the lint until it was gone. The activator needs to be added to the dye, then the dye needs to be used quickly. I have read that after 45 minutes, it is technically exhausted or has lost a lot of potency.
  8. Wrap the dyed fiber and leave in a warm place for the dye to work - Unlike the acid dyes, the MX dyes work at warm room temperature and do not like to get too hot. It was a fairly cool day so, I put my plexiglass cover on the concrete container with the wrapped dyed fiber and left it in the sun for a couple of hours. Then I left the dyed fiber alone until the next day before I began rinsing.
  9. Rinse and rinse and rinse - Here is something that I find frustrating about the MX dyes - all the rinsing required. I have found that the item or yarn or fiber needs about 10 rinses in cool water before the water is semi-clear. I rinsed out the fiber
  10. Scour the rinsed fiber and set the color - Next I put the fiber back in the pot of water with some Dawn and brought it up to a simmer for another 30 minutes to set the color.
  11. Rinse out the soap, squeeze the fiber out - I had the bright idea to put the dyed lint in my front loader and spin it out. I put it in a mesh bag, but the heavy cotton that was full of water made the machine very unhappy. Next time I do this, I will remember to split it over several bags.
  12. Dry the fiber - I put dyed lint in a mesh bag and gave it a dryer cycle which left it pretty wet still. Then, I let it dry over night and gave it another dryer cycle and it was slightly damp, so I put it in a mesh hamper that would let the air get to it and hung it to dry another day.
  13. Tease, card and spin - I have started making punis from the fiber. It is going to be so much fun to spin my colored cotton!

Here is my pile of cotton fiber with some of the punis I have made so far. I will probably card all of it before I start spinning.

I am still not as comfortable with the MX dyes as with acid dyes on wool. This session helped some, but I guess I need more practice. Fortunately I have another pound and a half of cotton lint.

Now, I want to get out the bamboo roving I have and try dyeing that!

Sunday, April 26, 2009

Clothes for Hand Cards


I have wanted to protect my hand cards from the elements for a while. I usually keep them tied together to protect the teeth, but that seemed like not enough. I am about to embark on a large, for me, carding project, and my cards are going to have to do a bit of traveling, so they really needed some clothes.

Today, I thought of a quick way to make them a cover in a short amount of time, and at the same time reuse something old.

You can do this for your cards too. It just takes minimal sewing skills, an old pair of jeans - preferably from a man, because you want wide legs at the bottom, and about 1 1/2 yards of 1 inch wide grosgrain ribbon. You will also need a sewing machine and an iron, but I suppose you could do without these things and have something a little less finished.

Here are the steps to make a cover for your cards:


  1. Lay the jeans out on a table or cutting board. See if one of your cards will fit into the bottom of the leg. Mine just fit in my husband's old jeans. If they don't fit because the leg is too small, you just will have to hem both ends. Move the cards up until the jean leg is wide enough to hold the card and whack off the hem there.


  2. See how deep the pockets need to be. For my cards, one pocket needed to be about 6 inches deep, so for the two pockets, I needed a minimum of 12 inches plus some ease for folding.


  3. Cut off the leg of the jeans at 2 times the depth you need plus about one inch for a hem. If you need to hem both ends, then allow another inch. For my cards, I cut the leg of the jeans at about 13 1/2 inches, giving the pocket a little more depth. I would err on the side of too deep rather than not deep enough.


  4. If you find your jeans are way too big for the cards, then you could take up the inside leg seam to fit your carders. Also, jeans taper down to the ankle, so one end of your tube will be a little larger than the other one. This did not bother me, but if it bothers you, then adjust the inside seam to straighten things out. If your jeans are just not big enough, then, I would take both legs, and cut them at the desired length. Open up the seam that is not topstitched, and then sew the two legs together to make your tube at the right size for your cards.


  5. Take the piece of jean leg and hem the end you cut. I just serged the raw edge and pressed under about an inch, then sewed around the opening with a straight stitch on my machine.


  6. Fold the tube in half with the hems together. Locate the center and mark with a pin. Sew the center of your ribbon through all layers at this point with your sewing machine.


  7. Now still with the hems together, open the pocket up and sew the insides together along the hem. Leave the outsides of the pockets free. This will keep your pockets together and keep things from flopping when you put in your cards.


  8. You now have 2 pockets, one for each card. Put in your hand cards, wrap the ribbon around the handles and tie in a bow.
I hope this makes sense to you and that your cards get clothes.


Sunday, March 15, 2009

Wildflower Whiners Retreat

This weekend is the wonderful Wildflower Fiber Spinning Retreat. Unfortunately, I could not go this year due to other obligations. I was not alone. Several of my Spinning Buddies in the "Texas Twisters" also could not go. So, we decided to have our own retreat which we called the "Wildflower Whiners Spinning Retreat".

Our retreat had lots of the fun elements of the real Wildflower Retreat - food, spinning, workshops and laughing without the drawback of not sleeping in our own beds!

There were six of us, Joanne, Laurie, Maxine, Marlene, Terri and me and we gathered at my house on Saturday morning. Everyone brought their wheels. Joanne brought a wonderful cake, Laurie brought cream cheese, jelly and crackers and I made Lemon Bars. So we ate and had coffee and spun.


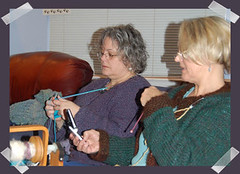
Joanne and Laurie learning to knit in the Portuguese WayAfter lunch we had our "workshops." Marlene bought her Portuguese Knitting DVD and so we watched that. To knit "in the Portuguese way" you tension the yarn through a pin or around your neck. The yarn is wrapped with a flick of your non-dominate hands thumb (left thumb for all you right handers) and it rests either on top (for knit stitches) or underneath (for purl stitches) of your needle. This method of knitting requires much less hand stress than knitting English or Continental style.
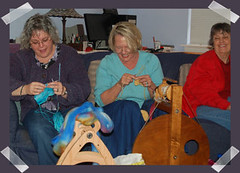

Laurie and Joanne tried it out while the rest of us kept spinning. There were some fits and starts. Joanne thought she was doing the knit stitch, but it turned our she had learned the purl stitch. There was lots of laughing about this.
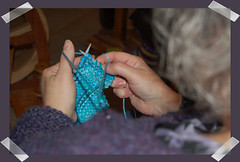

At the real Wildflower Retreat, Cindy and Rita took a workshop on Viking Knitting where they made bracelets. They texted us a photo of their bracelets,so of course we had to send them photos of our Portuguese Knitting Workshop!


Our second "workshop" was the Patsy Zawistoski DVD on Spinning Cotton, Silk and Flax. It made me want to get my cotton sliver out and spin it. That just may be the next thing on my wheel since I was able to finish plying the fiber we dyed at the Winter Fiber Fun Retreat yesterday.


Joanne and Laurie learning to knit in the Portuguese WayAfter everyone left, I searched YouTube for
Portuguese Knitting
and found several good videos of the technique. I spent the evening learning how to do it - left handed of course! I managed several rows of the kitchen towel that I am knitting. While I might not totally switch to this technique, I am glad to have it in my bag of tricks and will keep trying it.

We had a really fun day. It was so nice to be able to get together with good friends and share the crafts that we are passionate about.

It did help make up for not being able to go to Wildflower this year.

Sunday, November 16, 2008

My Head Hurts


I've spent the last two days at a Spinning Seminar with none other than Spinning Diva, Patsy Zawistoski, and my mind is about to burst with all the new knowledge I have gained. The photo shows only a few of the samples from the weekend.

On Saturday, we spent the day learning how to spin several types of Novelty Yarns. If this had been the only thing offered, I might not have signed up because I really don't like lumpy bumpy spinning. Instead of being boring and uninteresting, like I half expected, it was a wonderful day. Spinning those lumpy bumpy yarns was way more fun than I ever imagined.

We learned what kinds of yarn we normally spin - soft, medium or hard. My normal spinning is soft it turns out. That was a surprise to me. I would have thought it was medium at least. We learned how to make a sample for our records (now maybe I need to actually keep some) and we learned how to Miss America ply for short, quick samples. This is similar to Andean plying and saves having to locate a ball winder when you only have a little yarn to be plied.

What kind of yarn you spin is important to some of the techniques for the novelty yarns. Different yarns require components that are spun at certain hardness's.

Next we learned how to make a cabled yarn. I had read the procedure for this before, but had never tried doing it. Cabled yarns are a four ply made from two two ply yarns. Some of the plying is done "S" and some is done "Z". It is really important to have the right amount of twist in so your yarn does not fall apart.

As the day progressed, we learned to make bumps in our yarn on purpose. We made core wrapped yarns where the core was a sewing thread and the same thread was used as a binder. The other fiber was mohair locks. Now I know what to do with some of the mohair I have accumulated. We also found out what happens when you ply a single with woolly nylon serger thread.

All in all the day of the seminar I was NOT looking forward to was wonderful. Would the seminar day I wanted most be disappointing in comparison?

Today, the seminar was on "Silk, the Queen of Fibers". Patsy started out talking about the different types of silk we might find to spin and told us about how they were prepared. She then passed out part of a silk cap for us to spin samples from. We spun some Cinnamon Tussah Silk, and plied that with the silk cap single for another beautiful yarn.

Patsy had us spin from ten different types of silk preparations. We learned how to evaluate each type as far as ease of spinning and what type of speed worked the best on each one. We talked about possible uses for each type of silk. We prepared some silk cocoons for spinning. We had lots of fun blending various silk waste products with wool. Patsy had some cut silk waste, some short waste and some sari silk waste and showed us how to blend them into plain wool for a unique and special yarn.

Patsy had a wonderful record card for us to keep our samples on. The card ends up with samples of each of the original fibers plus the end resulting yarn. It is really a great reminder of what we did and what we learned. I wish I was disciplined enough to keep this record for all my spinning. The cards for the novelty yarns end up with the yarn recipe on them. Often, I never look at workshop materials once the workshop is done. I know that is not true for this workshop though. We ended up with very useful stuff.

Some of todays knowledge was not silk specific, but will be a help to all my spinning. Patsy taught us the proper way to evaluate the wraps per inch of a yarn or single. She gave everyone a stick for this and told us how to mark it. We learned how to count the actual number of revolutions a particular whorl will give when spinning so that can be part of the records for the yarn. We learned how to make a sample card so we can keep a yarn consistent no matter how long it takes to spin. We learned how to ply a yarn that has spent too many days on the bobbin and seems to have lost it's twist. We talked about the different types of wheels and tensioning systems. We learned about the differences in Scotch Tensions and why some brake bands are fine if they are fishing line and others require a soft string.

So, I definitely was not disappointed today either. Patsy is a wonderful, organized instructor. I guess her experiences teaching preschoolers are a big help for teaching spinners. She carefully explains the "why" in her instructions. She is not a "my way or the highway" type instructor at all. If you have a chance to take any spinning seminars from Patsy, clear your calendar so you can go and run don't walk. This was a totally awesome weekend, worth the headache from all the knowledge that was pounded in.